An electric fence is a good choice for any property owner looking to keep their livestock or pets safely enclosed. It can be used to create an invisible barrier that will shock those who come into contact with it, discouraging them from crossing the line again. Electric fences are easy and inexpensive to install, but they require electricity in order to function properly.
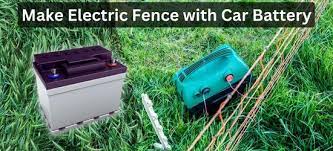
In this article, we’ll discuss how you can make your own electric fence using a car battery as the power source.
Step 1: Collect Material
- Two 10 foot pieces of steel rebar
- Something strong enough to hold the rebar securely
- Wire cutters or pliers
- 10 turns of 12gauge copper wire
- 10 pairs of electrical wire connectors
- A car battery with jumper cables
- Drill
Step 2: Mark out your opening.
Find the exact center by measuring how far apart you want them to be. Draw a line in each direction and then connect the two lines where you measured. You should now have 4 lines that are exactly the same distance apart. Then, place 2 pieces of rebar on either side of one set of your four lines. Use something sturdy to hold it in place while you do the next step. Repeat for all 4 sets of lines. Be sure are not too close together, but not too far that you have different sizes of openings.
Step 3: Drilling holes in the rebar for the wire
Once your 4 lines are secure, take your drill and make 3 holes through each section of the rebar where the electrical wire will be run.
Step 4: Add copper wires to both sides of legs
Run a piece of copper wire through each hole that you drilled. Make sure it is long enough to reach all the way across. Then, attach an electrical wire connector to both sides of each leg using pliers/wire cutters by twisting them onto each copper wire.
Step 5: Attach copper wire to car battery and attach other end to second side of electrical wire connectors
Attach one leg on either side of the opening to your car battery. Make sure you use alligator clips for both sides, not just one side. This way, if one falls off it will not affect the whole fence.
Run a piece of copper wire from each hole that you drilled in step 3 out the other set of holes (the ones at the opposite end). Use pliers/wire cutters to twist an electrical wire connector onto each piece of copper wire.
Step 6: Connecting legs to first side with wire connectors
Next, take another piece of copper wire and attach it securely to both sets of wires in the opposite direction (both sets should be attached to each other). Twist on an electrical wire connector to secure it.
Use your pliers/wire cutters and attach one twist on terminal onto each copper wire running from hole 1. Make sure to use a different one than you used for the others.
Step 7: Making the fence live
To make the fence be live, simply connect your negative terminal to the ground and you are ready to go! Make sure it is an alligator clip for both sides.
Be careful using this around kids or pets–the shock can easily knock them over if they aren’t expecting it so stay vigilant when in use!
Conclusion
The electric fence can be made with a car battery, some wire and an alligator clip. You’ll need to make sure the connections are insulated so you don’t get shocked when touching it. Alligator clips are typically used for this purpose because they have large rubber tips that prevent electrical shocks from occurring while connecting two wires together. Make sure your connection is tight enough to keep the power running but not too tight or else it will break off in time.
If you’re using more than one battery then connect them in parallel instead of series (parallel circuits carry less current). Finally, cover up any metal on the outside of your enclosure with plastic tape to avoid shorting out anything if someone accidentally touches it!
