One option is to have the freon removed through an oil change. The process involves draining the oil and replacing it with a solution that will absorb the freon as it’s re-circulating through the engine. Once the oil has been drained, you can have your freon removed by taking your car to a shop that specializes in this sort of thing.
Another option is to buy a recovery machine yourself and do the job yourself. The machine is relatively inexpensive and easy to use, so if you’d like more control over how your freon removal is done and don’t mind doing some research on how to use the machine, this might be an option for you.
The third option is to get someone else who knows how to do it for you, someone at a repair shop or mechanic who works with cars often enough that they know how to remove freon from them without specialized equipment.
Two cans of Freon recovery solvent
Recovery machine, the first thing you’ll need is two cans of Freon recovery solvent. You can find this at any auto parts store, and it’s usually pretty cheap.
You’ll want to make sure that your car is parked in a well-ventilated area. You don’t want any chemicals getting into your lungs or eyes. Also, make sure that no one else is around you definitely don’t want anyone inhaling toxic fumes or coming into contact with Freon while it’s being removed from your car.
Once you’ve done all that, you can begin by opening up the hood of your car and locating the radiator cap. Unscrew it, then place one can of solvent directly on top of the radiator cap.
The other can should be placed directly on top of where it says refrigerant on the vehicle’s identification sticker this will help speed up how quickly the solvent works.
How to remove Freon safely?
The first and safest way is to have a professional remove it for you, but if you’re in a pinch and don’t have time to call a professional, here are some tips for safely removing it yourself.
Open the hood of your car and disconnect the battery. Make sure there’s no power running through your car before continuing with this process. Put on gloves and safety glasses before getting started.
Use a blanket or cardboard box around the area where you’ll be working—you don’t want anything else getting into the gas tank.
Open up the gas tank cap (it’s probably best if you don’t do this part yourself) and use a rag or paper towel to wipe off any excess gas that may have leaked out during driving or sitting idle for long periods of time.
Once everything has been wiped down, open up one of those small cans of compressed air that you can find at any drugstore—the kind used to clean computer keyboards and spray down all areas where there may be Freon residue left behind after draining it out completely (these cans usually come with protective.
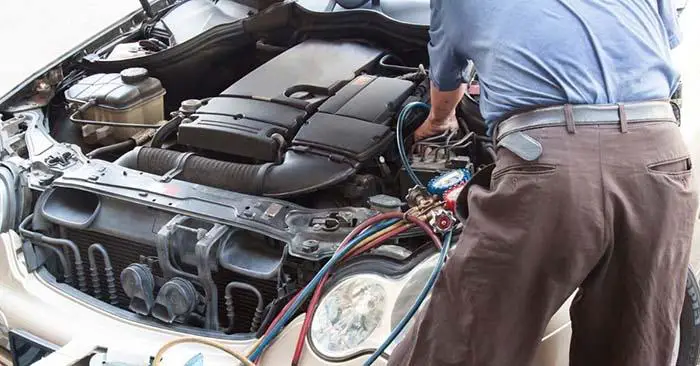
Open the car’s hood and locate the freon lines
Open the car’s hood and locate the freon lines. They are usually color-coded with black or blue, but they can also be white, yellow, or red. These lines carry Freon throughout your vehicle’s cooling system.
Once you’ve found them, detach them from their connectors by unscrewing them with a wrench. If you don’t have a wrench handy, don’t worry—you can use a pair of pliers to loosen them up enough so that you can pull them free from the connector with your fingers.
After you’ve detached all of your freon lines from their connectors, turn on your car and let it run for about 15 minutes to ensure that all of the Freon have been evacuated from the system.
Then turn off the car and disconnect its battery in order to prevent accidentally starting it again before everything is ready for reinstallation.
Disconnect the freon line from the fill port
When you’re removing freon from a car without a recovery machine, there are two main things you need to do in order to get the job done disconnect the freon line from the fill port, and then remove the line from its connection to the compressor.
To disconnect the freon line from the fill port, first, loosen or remove all of the bolts that hold it in place. Then use a wrench to loosen any clamps that are holding it down, and pull it up and out of its hole.
To remove the line from its connection to the compressor, use a socket wrench to unscrew all of the nuts on both ends of each side of this connection. Once everything is loose and ready to come off, just pull it straight off.
What do you need to remove freon from a car?
The first thing you need is a recovery machine. This is usually an industrial-strength machine that will be able to remove the freon from your car’s system in one go. It’s important to note that if you have a small amount of freon in your system, this may not be necessary. It’s best to start with smaller amounts and work your way up as needed.
The second thing you need is a vacuum pump. This is used to suck out the freon from your vehicle’s system after it has been removed by your recovery machine. You can use any vacuum pump for this purpose, but make sure it’s compatible with your recovery machine before purchasing one.
Conclusion
You can remove freon from your car without a recovery machine. But it’s not easy, and it’s not going to work every time. It’s also not something we recommend trying on your own, or even with friends or family, you need to be very careful when dealing with freon, because it can be dangerous if you don’t know what you’re doing.
